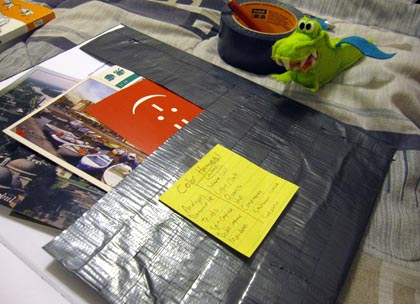
My working sketchbook goes on adventures with me. Sometimes I’ll end up with ticket stubs or programs from events– and sometimes I’ve got worksheets from class, or doodles friends have given me. I like to keep these items organized chronologically, and stuff them in the back of my sketchbooks, where I’ve built a duct-tape pocket to prevent things from falling out. Now you can make one, too!

You’ll need:

- Sketchbook (of course…)
- Duct tape
- X-acto knife
- 25 minutes
Scissors would work in place of the X-acto, but I prefer the X-acto because duct tape could sticky-ify your scissors. Technically you could get away without a cutting device because some duct-tapes can be ripped. It’s a convenience!
When stretching duct-tape for this project, unroll more than enough for each step. It’s easiest that way when folding-over the tape, so you don’t need to consistently unroll as you’re sticking it.
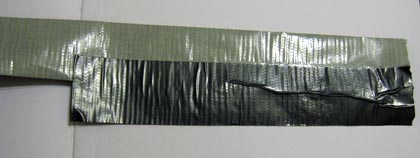
1. In the previous picture, notice how the duct tape was stretched out the width of the sketchbook’s back cover, save half an inch or so. Then I doubled it over itself:
2. Cut this piece at the original edge, once it’s completely doubled-over. Make sure the folded-over edge (shown in the last photo) is facing TOWARD the spine. Unroll more duct tape, and place the last strip about 3/4″-1″ below the new strip, making sure the raw edges match, as seen here: 
3. Fold this new strip over and cut at the raw edge. You should now have a nice start to a sheet of duct tape! 
4. Keep building these, placing the LAST strip at the bottom of the NEW one. This will make the overlapping edges of duct tape layers all run the same direction– making it easy to slip in sheets of paper. (If you build it top-bottom, you’ll end up fighting all those edges when you put in a sheet of paper). I prefer 11×14″ sketchbooks, so the back pockets I make are always pretty large. For the height of these sketchbooks, I’ve found 5 layers of duct tape to make a nice flap. 
5. Once you make a flap that’s at a height you’re happy with, you’ll need to make the vertical edge flap. (I like security and knowing things aren’t going to go falling out of my sketchbooks). Just like before, start the duct tape against the raw edge, this time going up vertically. I overlap by about an inch, folding where the X-acto is pointing:Â 
6. Once folded over, repeat again, placing the next layer just to the left. By now the flap should be complete. In this example, the horizontal layers were not perfectly layered– a little bit of rotation happened. I put an extra piece of duct tape at the bottom to “fill in the gap”. 
7. Time to tape it down! I line up the bottom, lay another strip of duct tape (exactly the width of the left edge of the flap to the outer edge of the sketchbook) and fold it over. 
8. Tape up the vertical side, and you’re done! 
If you go through a lot of sketchbooks, you can use clear packing tape and tape on important notes that you like to always keep handy (like I’ve got here with my color harmonies and contrasts). Packing tape easily un-sticks from duct tape and re-sticks onto other duct tape, meaning it’s easy to shuffle notes from one sketchbook to the next. You could always add extra duct-tape pockets if you so pleased using the same methods for the pocket.
Happy sketchbooking!

