
Scanners. They’re our amazing link between the traditional and digital world. Yet, we have a slight issue when we’ve created a piece that’s just a little too large to scan in. Should you scan in just a portion and leave that to your digital workings? It would most certainly be nice to get a full-detail version into Photoshop with 300dpi, though…. and digitally photographing artwork often ends with blurry, washed-out results. Never fear! I now bring to you the ultimate scanning and mending tutorial.
Here’s the plan:
Take your artwork and scan it in up to four “pieces”.
Using layers, masks and gradients, move and mend the pieces together until you have a complete whole in Photoshop.
NOTE: Some pieces of art are simply too large to fit onto a scanner. Open your scanner and hold your piece over it, matching orientation (portrait or landscape). If the scanner’s area is more than halfway as long and deep as your piece, this process will work. Otherwise, you’ll have to photograph it. Also, this only works with non-solid artwork (so no paint board or canvas pieces, sorry!)– the reasoning behind that is your scanner focuses only on what’s ON the surface. If your piece lays on top and is lifted even the slightest on one edge due to the scanner’s contour, you’re going to end up with a blurry picture.
Rambling aside, let’s get started!
Decide in what direction your piece is too large for your scanner. In this case, there’s a slight overlap seen at the bottom, or the left side of the piece.
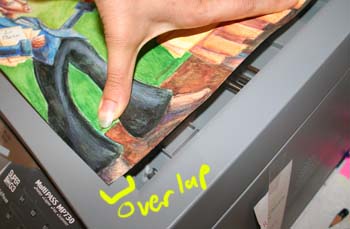
In order to capture the entire piece, we’re going to have to turn it 90 degrees and scan it in twice, once capturing the top, the other capturing the bottom. So long as we pick up all the edges, we’re good. (And when scanning, the shorter the area to ‘mend’, the better. In this case, I’ll be mending in a portrait orientation. I *could* mend landscape, but matching it up will ultimately be more difficult in the end).
Next, scan in “piece 1”. Please note that even though your piece may be on a flat paper, it’s still important to hold down the scanner’s flap in order to ensure any buckles in the paper don’t result with a distorted scan.


Flip, rinse, repeat! (or– flip it around and scan it in the other direction).
You should now have two pieces.
Duplicate the original layers by dragging them onto the  button. Hide the original layers.
Flip the pictures (Image>Rotate Canvas>90 degrees CW/CCW) if needed. And, zoom in 100% and look atthe edges. Some scanners (such as mine) don’t scan in every nanometer of data, and sometimes leave a white edge.

That extra whitespace needs to GO! Thankfully, there’s the Rectangular Marquee tool that will take care of that. (OR the magic wand tool).

Using the rectangular marquee or magic wand tool, select all your whitespace and delete it.

Repeat this on your other piece(s). Now we get to mend! CTRL+click on the active layer of one of the pieces. (Mac users, I believe Apple-click is the alternative). This will select everything on that layer. Edit>Copy to copy your selection. Go File>New; chances are, Photoshop’s presets will make the size of the new document matched to what you have on your copy clipboard. In my case, it wants the dimensions to be 2694×2517 at 300dpi. I already know that the width of the piece will not change when I add my second piece; however, the height will. I’m going to put 4000 pixels in as my height– yes, I know that’s way too much, but that’s far better than too little. I’ll trim it back later.
Edit>paste in your copied layer, and use the move tool to bring this piece all the way to its edge– in my case, I’m going from the top down, so I snapped it to the top of my new document. There’s still a little white space on the left side because the scan was at a slight angle (as often happens).

Zoom in again to 100% and observe your “mending” edge.

Oh no!! There are blurry pixels at the bottom! We’ll keep that in mind so we know that needs to be masked off– or we’ll use the other piece to mend with instead.
Speaking of which, copy the other piece’s layer into this document…

and align it as best as possible. (This often involves lots of zooming). There’s often a slight rotation difference between the two pieces, so Ctrl+T to transform your selected layer– this allows you to rotate them. Sometimes, putting one layer’s opacity down will allow you to better align your two pieces.
With the arrow tool selected, you can nudge your current layer by using the arrow keys. With your layer’s opacity brought way down, (40% in this case) you can easily spot when the layers are matched, hence ready to blend.
 <bad blend
 < good blend!
Looking at these blending photos, it’s obvious that this second layer also has an unfocused edge. We’ll keep that in mind for the next step, which is masking. Create a layer mask by clicking this: 
Set your gradient tool to the black and white gradient (set your foreground/background to black and white first).

Drag a gradient starting just after the blurry pixels, and going in a bit into the crisp pixels of the current layer.

…The result should be a seamless connection between both layers!

All that’s left is cropping… then you’re done!

For a larger piece, here’s an alternative mapping/piecing map/method. Just make sure to line up your pixels with your opacities down, then crank up your opacities and add masks with black/white gradients.

Hope this tutorial is helpful! I tried to make it as detailed as possible… if you have any questions, please feel free to comment. Thanks!
omg that sketch is awesome where did you get the idea for that XD. Nice special effects with the commentary on your pictures hehe… *raises hand* I have a question what if your dealing with a very delicate art piece where if you put pressure on top of the scanner flap it could potentially damage the art itself, but you still don’t want to get any blurry edges?
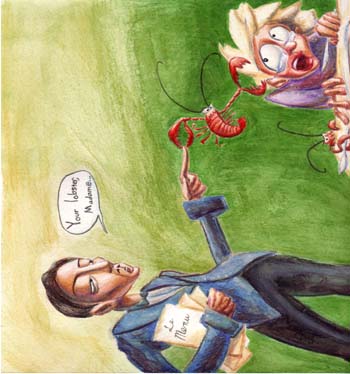
hehe the idea originated when I was watching one of the waiters on my last cruise…. He wasn’t too enthused about his job, and I could totally see him serving lobster sushi.
Ah right! Thanks for asking about the DELICATE ARTWORK issue.
True, I have had sketches where after scanning, a crease WILL occur somewhere near the middle, due to the edge of the scanner. Generally the crease isn’t that big of an issue, and will be unnoticeable once framed (and hence flattened)– However, I have seen some lasting effects (VERY FEW) and if an iron doesn’t fix it…. (haha jk!)– if the artwork is extremely precious and, well, frail, this may be too risky a procedure to put your art through. Testing out the scanner’s flap pressure on another paper the same as the first (sans artwork) will give you an idea of how safe it is to try it on your real artwork. Remember to use fixative on graphite pieces; charcoal will likely get all over everything, so I don’t recommend scanning it– and pastel– oil (EEK!) or chalk– will give you a mess you’ll never forget, so with these pieces your best bet is to photograph them.
Overall, most scanners have a very slight lip at the edge of the scanning area, so any creases are barely noticeable; however, do a pressure test on another paper the same as the art’s on in order to tell if you really want to scan it or not.