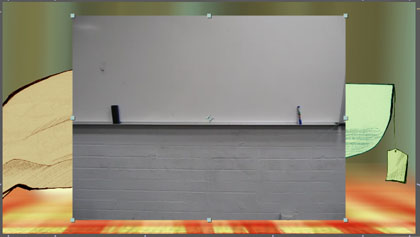
Sometimes animated films can feel a little too “animationey” in their cinematography, with perfectly smooth camera moves and still holds. With the magic of After Effects and a 24fps handheld video cam (if your cell phone can handle it, go for it), you can make still shots feel like they were shot on a handicam.
Here’s the plan:
- Get footage to use Motion Tracking on
- Import into After Effects and track it
- Apply tracked movements to a null object
- Parent camera to null object
- Make sure all layers are in 3D space for the best outcome
1. If at all possible, choose as plain as possible of a background and have two very clear points of visual contrast on it. If you have access to a large marker/chalk board, you may try drawing two large dots on it (with several feet of distance between them if possible). Stand back from the board and get both the points in your camera’s view, then shoot as much footage as you think you’ll need. Keep in mind that you can re-use chunks of footage for multiple shots. (As animation doesn’t tend to have epic-long shots, you could technically re-use the same 15-second-long footage over and over). It’s important to keep your hand steady as to not have too frenetic movements, but enough conscious movement that it feels as though the balance is being fought.
2. Next, import the footage into After Effects. Drag it into your main composition and size it up so it takes up a good majority of your stage. Open up your motion tracker by going Window > Tracker if you haven’t already.

3. Make a Null layer, and make sure it’s on top (Layer>New>Null Object). Also make it a 3D layer. Select your motion tracking movie layer, and then Track Motion under the Tracker. This’ll bring up just that layer (movie). You’re able to track position, rotation and scale. I generally go for position and rotation (though scale can be useful depending on your needs, and rotation can be a hindrance if you want your camera to remain horizontally stable). The motion tracker will bring up two points. Dragging the center box will allow you to move it around to the point of contrast that you want to track. The outer box tells After Effects the spatial boundary range that it can search for the point defined in the center box. Dragging the corners of the boxes will define their size. (Dragging the center box can also define the outer box’s range). Make sure that it’s very clear within the center box what the point of visual contrast is that you’re using to track. Try to choose objects that are a distance from each other, for better tracking results. The larger the spaces defined, the more processing power it’s going to take (aka time) for After Effects to track your motion.
![]()
4. Set your target: Edit Target > Select the Null object layer.
5. Go to the first frame that you want to track and hit the Analyze: > (play) button under the Tracker! Watch as it tracks your motion, and make sure you’re happy with it… If it loses track of a point, you may need to go back to the first frame and adjust the size/placement of the tracking boxes and then re-analyze it. If the clip expands the duration of your comp, you may need to hit the stop button. If you’re happy with the way your tracking went, click the Apply button (and then make sure X and Y is selected) Â to give all the motion-tracked information to the Null.
6. There’s a chance that your motion tracking went pretty well overall, but there were a few pops/jumps that didn’t make sense with the overall footage. You can select the Null’s layer and either delete those keyframes or edit their position on the Stage. Use the arrow tool and drag and drop them around until you’re happy with the movement. This is zoomed in 800%:

7. Do you have a camera set up yet? If not, Layer>New>Camera! Also make sure that all your layers are set up in fancy 3D space so you’ll get some nice depth. Â Then parent your camera to the Null Object layer and take a look through it.
8. You may decide to do camera moves with the handicam; if so, make another Null Object layer (let’s call it ‘Camera Move’). Activate the layer’s 3D property. Set up your parenting structure so:
Camera > Camera Move > handicam null
Use the Camera Move layer to navigate the camera around in 3D space (pans/trucks/all that good stuff).
Comment with questions! Hope this is useful 🙂

Homg, homg, homg. Hyperventilating.
You are too awesome. Thanks so much for posting this, Tahnee!!
hehe no problem, glad you liked it! Go catch your breath… 😛